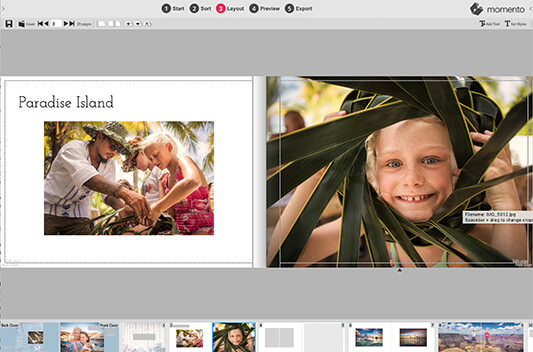
How to use Layout View
Whether you start a book with blank pages, an Auto-fill design or Themed Quickbook, you can easily edit and customise every detail in Layout View. Here we've highlighted some handy tools that can turn a good design into a masterpiece, and features that will give you maximum use of the software.
You'll find our how to navigate the software guide helpful too.
Watch our quick video guide on how templates make design super easy and learn more about applying templates below.
The Content Panels on the left of the software provide access to the folder of photos on your hard disc as well as the libraries of readymade backgrounds, frames, embellishments and templates that you can add to your project.
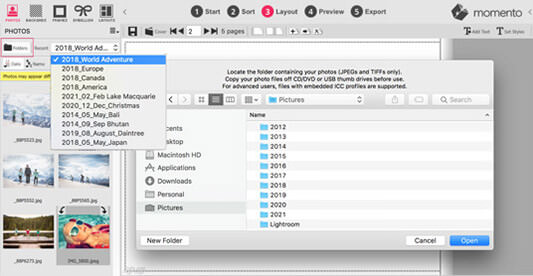
Use the Folders button to browse, select and load one or more folders of photos into the Photos Panel. Click the DATE or NAME buttons to adjust their order, and for quick access to the last ten folders use the Recent Folders drop down menu.
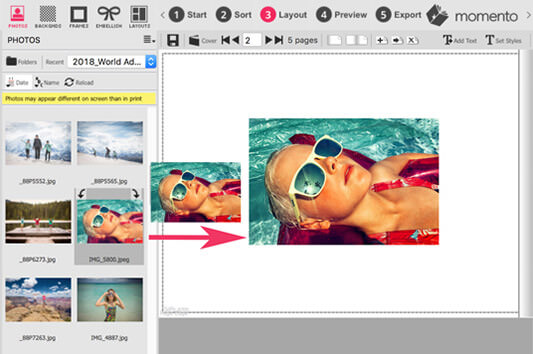
Simply drag-and-drop photos from the Photos Panel onto the Canvas to insert them into your project. For speed, select multiple continuous photos by holding the shift key when selecting the second photo. You can also hold the Command (Mac) or Control (Win) keys to select multiple non-continuous photos.
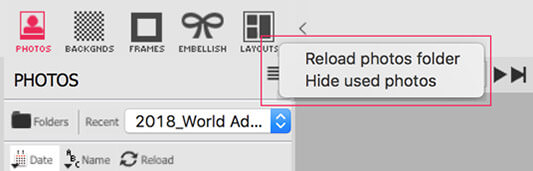
You may have hundreds of photos to add to your project. To see only the photos not yet included in your project, choose the Hide used photos option in the Photos burger menu. All photos already inserted in your project will vanish from the panel. If you delete a photo from your book at a later stage, it will reappear in the Photo panel.
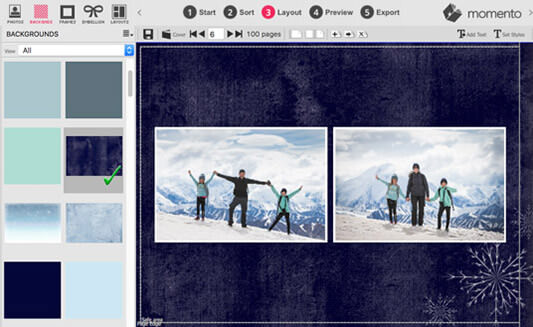
Plain and patterned backdrops are avilable to drag on or apply to your pages via the Backgrounds panel on the left side of the software. As with Embellishments, you can access many backgrounds via the Updater panel.
To make a photo stand out or fit into a design theme, decorative borders can be applied. Hundreds of shapes, colours and effects are available in the Frames Panel. Drag-and-drop or double click to apply a frame to a photo. To apply a frame to all selected photos, all photos on the page or all photos in all layouts use the burger sub menu. The Keyline frame also has options to set the thickness and colour of the frame.

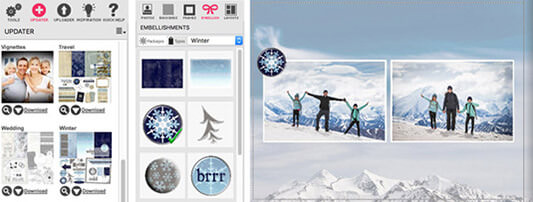
We’ve designed thousands of graphics, backgrounds, frames, borders and letters to decorate your designs. Use the Updater Panel on the right side of the software to install them then drag them to your photo book via the Embellishments Panel on the left side of the software. Learn how to embellish your project.
The software includes a powerful template engine that generates thousands of layouts with sophisticated designs, making photo book design fast and easy.
To access all the templates click the Layouts Panel tab at the top left of the software. You can view three different kinds:
- Pages - created for single page designs
- Spreads - created for double page pairs
- ACE - simple designs generated by our ACE algorithm
Watch our How To Use Templates video guide or read detailed instructions below.
MORE
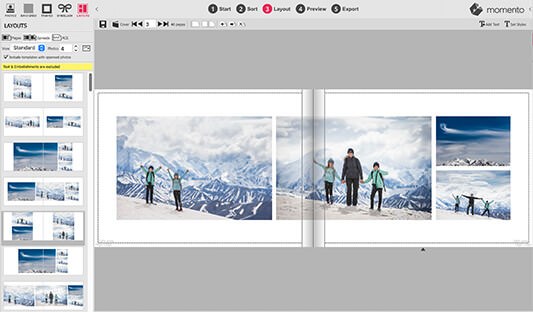
Layouts panel

The Layouts Panel cleverly sorts the templates to show the best-fit options for your photos at the top. When you add or remove a photo from your layout, it re-sorts itself to suit your new design.
Set Standard view
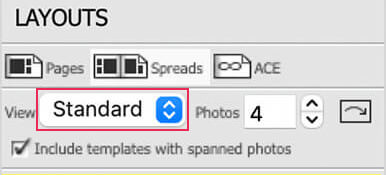
To access all the new page and spreads templates in the software, select Standard from the View drop down menu.
Single Page templates
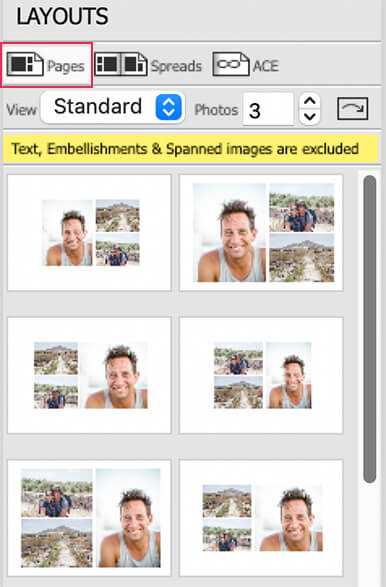
The Page templates have been designed with the single page in mind. You can pair it with any other single page template but the alignment of the left and right page may not match.
Spread templates
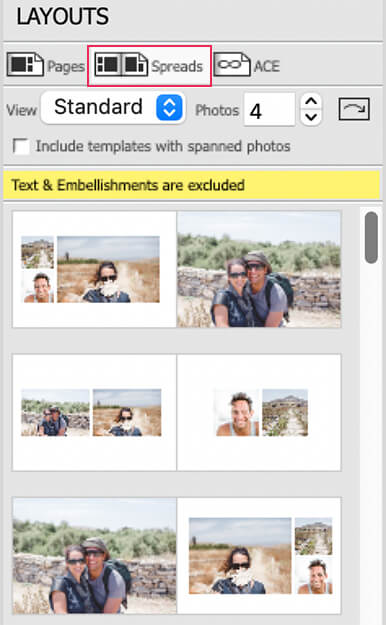
The Spreads templates have been crafted so that the design on the left page and right page complement each other. There is a consistent alignment of photos, and a visually pleasing balance, across the two pages.
Spreads templates with spanned photos
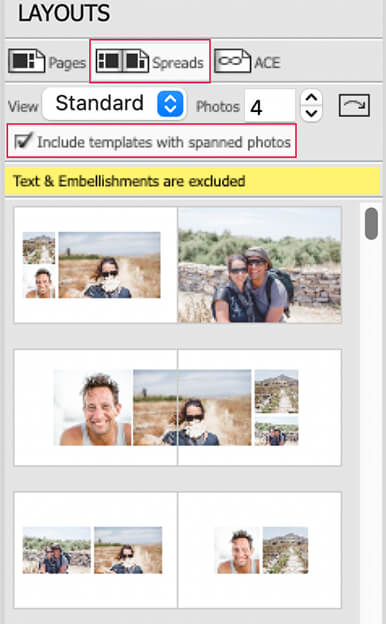
You can also check the box to view Spreads with spanned photos that extend from the left page across to the right. These layouts look similar to those found in professionally designed coffee table books. Just be careful to not position any important content, like faces, in the gutter.
Apply a template to a page or spread
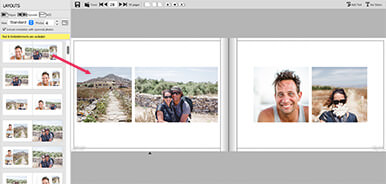
To apply a template, add photos to a page or spread then double click or drag your preferred design onto the canvas. The canvas will redraw to take on the design of the template.
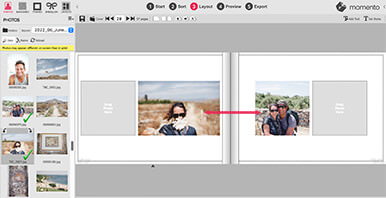
Fill template placeholders with photos
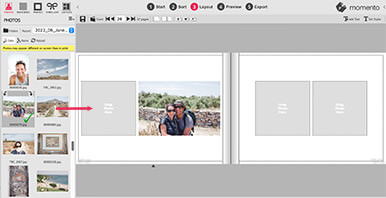
Alternatively, drag a template onto a blank canvas, then drop your photos into the empty placeholders.
Edit a template
These templates are ultimately just design guides. At any stage you can edit them as you wish. You can easily swap, add or delete photos, or apply another template.
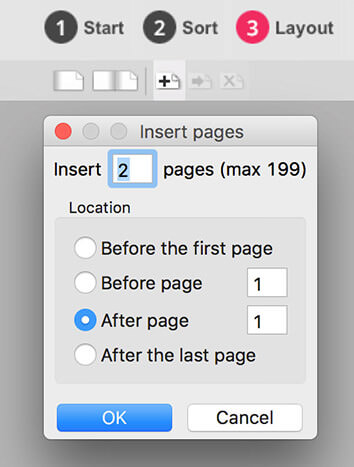
Some books need only a few pages to tell their story, others require more space for more content. To insert, remove or resequence pages in your project use the icons at the top of Layout View. We require at least 10 pages inside a book and the maximum number of pages is set according to the paper you choose. See our paper details for maximum pages.
If you delete pages that include a spanned photo across a spread, the software will prompt you with a question to remove one or two pages. Remove both to ensure the left and right page sequencing is maintained.
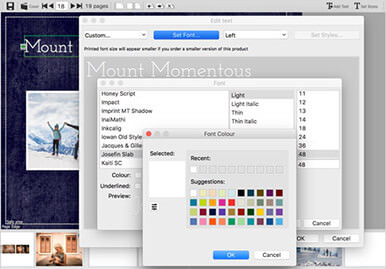
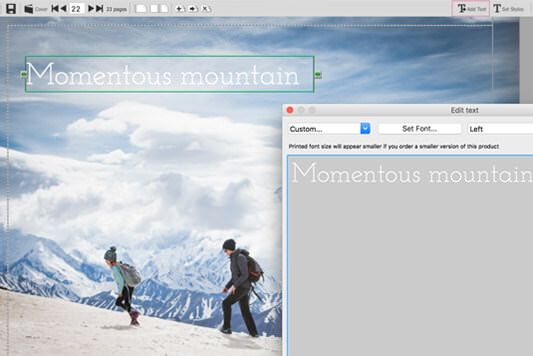
To add text, click the Add Text button (Comm+P / Ctrl+P) at the top right of the interface, place the cursor on the page where you’d like the text to appear and a text box appears. Type your words in or copy and paste from a text document then set your preferred font, size, and colour.
MORE
Text box
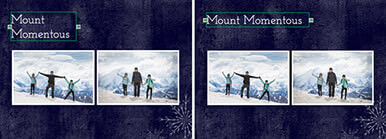
The text may appear to wrap over multiple lines. To make the text appear on a single line, drag the green arrows at the edge of the text box to resize it. As you drag the text box around the page, it will snap to other items in the same way as photos.
Add captions
To add a caption, select a photo then double click in the blue box that appears directly underneath the photo and enter your text into the text window. If needed adjust font, size and colour and set the alignment to left, right or centre.
Set text styles
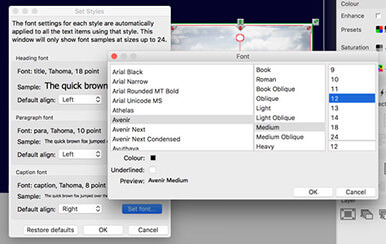
If you plan to use a lot of text you can use the Set Styles window to globally define the font and size for your headings, paragraphs and captions. If you decide to change the appearance of your text, Styles allow you to change it for the entire project at once, instead of having to change every text element individually.
The software includes tools that will automatically adjust photos and layouts to specific sizes and layouts, as well as tools that allow you to adjust them manually. Read on to get hands on with your design.
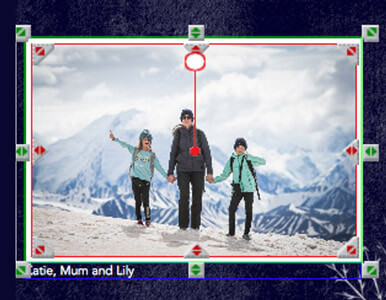
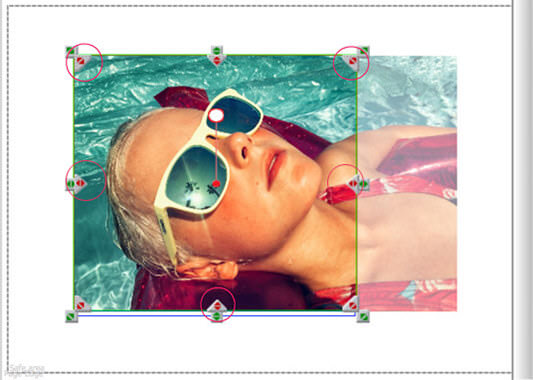
Some photos deserve to fill the page while others lend themselves to appearing smaller or in a group. You can enlarge or shrink a photo by dragging the green arrows at the corners or sides. Drag them inward to decrease the size, or outward to expand it. If you scale the image too large for the number of pixels available in the file, a Quality Warning will appear to tell you the image won’t be sharp once printed. Simply resize the file until the warning icon disappears.
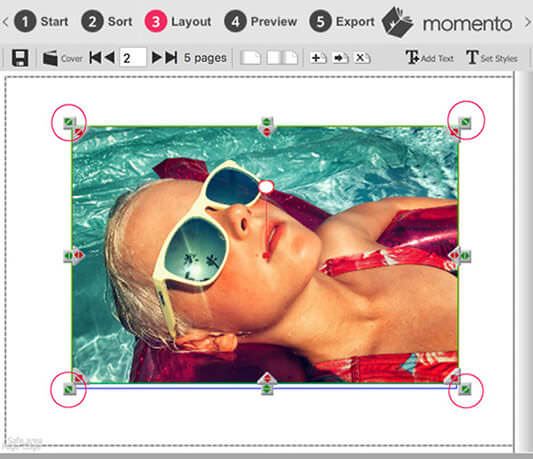
To remove part of a image or reframe the visible area of a photo drag the red arrows in or out. The cropped area will now appear to be faded. To change the cropped region, hold the spacebar and move the photo into your desired position. To reset the photo to its original uncropped format, right-click and select Clear cropping.
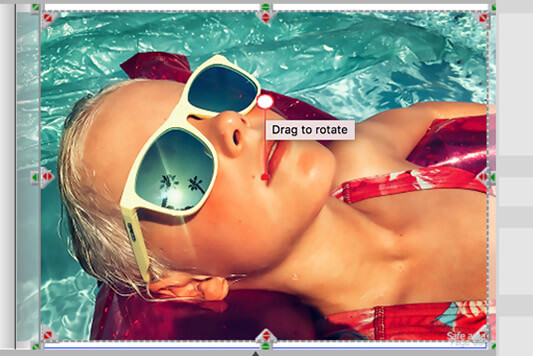
When a photo is selected a circle icon appears. Click and drag the icon in a clockwise or counter clockwise direction to rotate the photo.
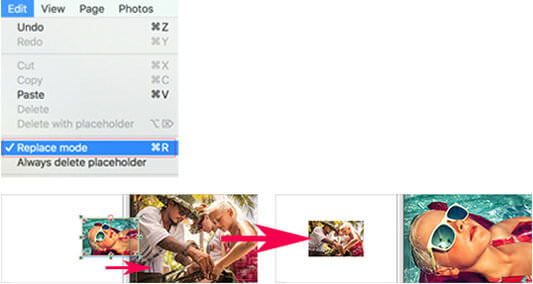
You can swap the location of two photos on the page by dragging one on top of the other. Replace Mode needs to be enabled in the the Edit Menu or with the Comm+R/Ctrl+Rkeys for this to happen. Sometimes you may want to drag a photo over another without replacing the original. You can disable replace mode or to temporarily reverse Replace Mode press and hold the Alt key before you drag the photo.
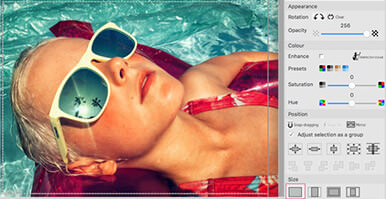
The Tools & Services panel on the right of the software allows you to move between five different panels. The first is the Tools panel. This is where a lot of the magic happens when designing your project. The Tools panel includes automated tools to adjust the appearance, colour, alignment, size and layering of photos.
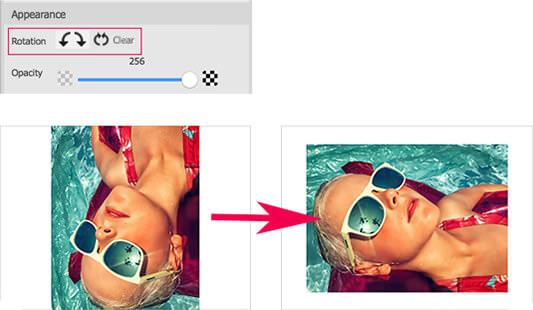
Use the left circular arrow in the Appearance sub menu to automatically rotate a photo by 90 degrees counter-clockwise, or use the right circular arrow to automatically rotate a photo by 90 degrees clockwise. Click the Clear buttons to undo the rotation.
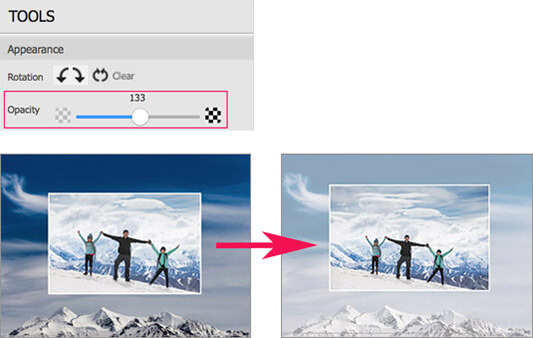
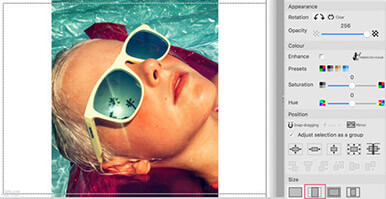
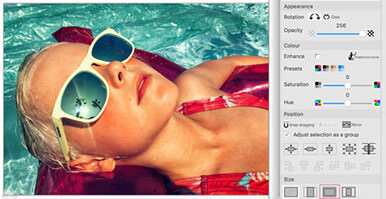
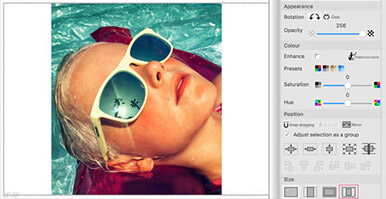
To make a photo or graphic transparent, slide the opacity tool to the left. As you reduce the opacity, the photo fades, becoming paler so that you can see photos or the background behind the photo. If you set the slider to 0, you will no longer see the image as it is completely see-through. If you move the slider to the far right, the image is at 100% opacity and it is opaque. You cannot see anything behind it.
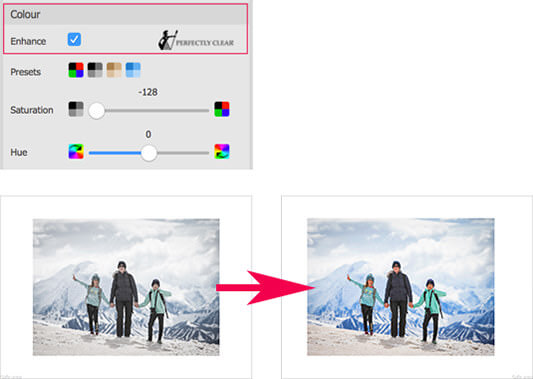
There are four different ways to adjust the colour of a photo or a group of photos. Enhance is a tool that will make your photos more vibrant. The effect will be applied to all photos in a book. If you have already made post production edits to your photos, don't use the Enhance option as the colours my be distorted. Learn more.
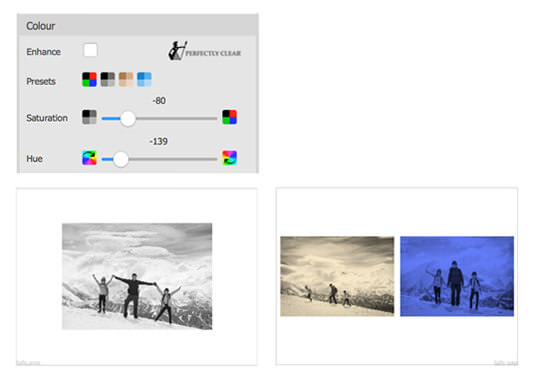
There are four preset colour options that will automatically convert a photo to greyscale, sepia tone or a single colour tint. Adjust the Saturation slider to increase or decrease the intensity of colours and contrast, or move the Hue slider to adjust the dominant colour in the photo. When applying the greyscale preset play with the Hue slider to change the style of the black and white effect and leave the Saturation slider at the very left. Learn more.
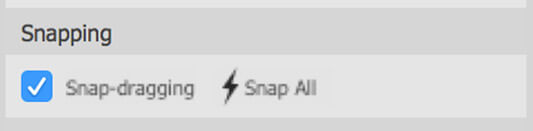
Snap-dragging allows any photo within a short range of another photo, a Guide, the Safe Area or the Print to Edge Area to automatically 'snap' into alignment with the object. Snap All allows all objects on a page within a few millimetres of any other object to automatically relatively align edges and give a symmetrical and slick finish to any page. Learn more.
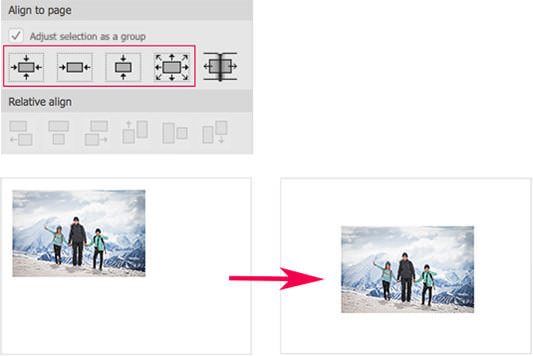
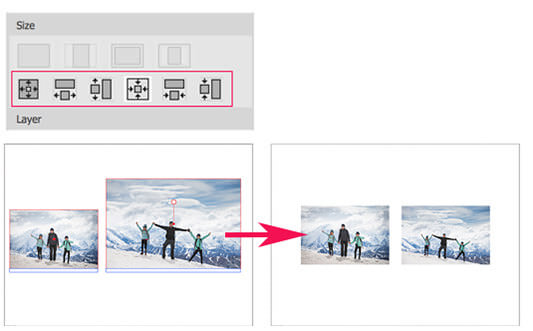
To position a photo, graphic or text box on a page you can manually drag it into the correct spot, nudge it into place using the arrow keys, click the Snap-dragging icon to analyse any page and align any photos within 2mm of each other, or use the auto align tools in the Tools Panel. These tools will centrally position the content, lock them into horizontal or vertical centre, or a predefined position based on your choice.
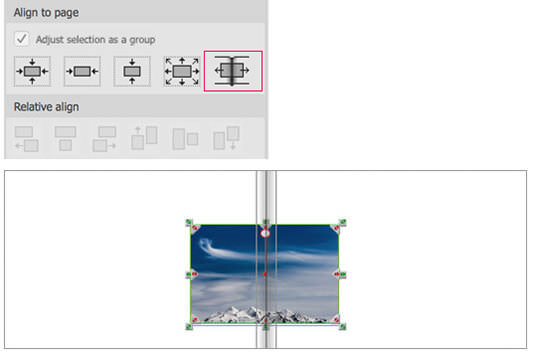
It's easy to have a photo appear across two pages. When in double page view, drag the photo onto the gutter so one part sits on the left page and the other part sits on the right.
Momento’s software calculates the overlap needed so that when the book is bound, the photo flows perfectly across the pages without replicating or losing any part of the photo.
To avoid goofy graphics when positioning photos over the gutter read our blog post on how to gutterproof your design.
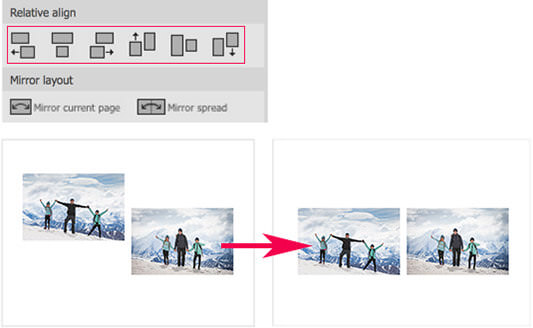
Align a photo to others
Symmetry ensures a professional look to any layout. To relatively align a group of photos select all photos you'd like to share a common edge, right-click any photo, select Relative align from the Layout Menu or use the icons in the Position panel on the right. Then choose to align to top, base, left or right and the photos will reposition.
To horizontally reverse the layout of a page, use the Mirror button in the Position section of the Tools panel (Comm+M / Ctrl+M). This allows you to keep the proportions while adding some visual difference. Note that this does not flip or mirror the images themselves, just their placement on the page. The same effect can be applied to a spread rather than a page, as well.

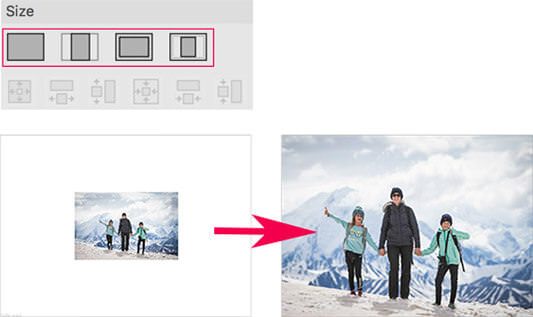
In addition to dragging the green arrows to resize a photo you can easily size it to the Safe area or the full page using the automated Size tools.
MORE
Fill page
Resizes a photo so that the shortest side is the same as the Page Area, and the photo meets all four edges of the page, and there is no white space visible. Some of the image will be cropped out of the frame.
Fit page
Makes a portrait photo stretch to perfectly align with the top and base edge of the Page Area, or a landscape photo expand to meet the left and right Page edges.
Fill to safe area
Resizes a photos so the shortest side (width or height) matches the length of the Safe Area rather than Page Area.
Fit to safe area
Makes the photo as large as possible to meet the top and base edge of the safe area, for a portrait image, or left and right edge for a landscape photo. The full image remains visible.
Size a group of photos to the largest, smallest, widest, narrowest, tallest or shortest image by selecting your photos then choosing your preferred size in the Size sub menu of the Tools panel. Alternatively you can right click and select your option from the Size To drop down menu. Choosing Size To from the Layout menu at the top of the interface also allows you to size photos relative to each other.
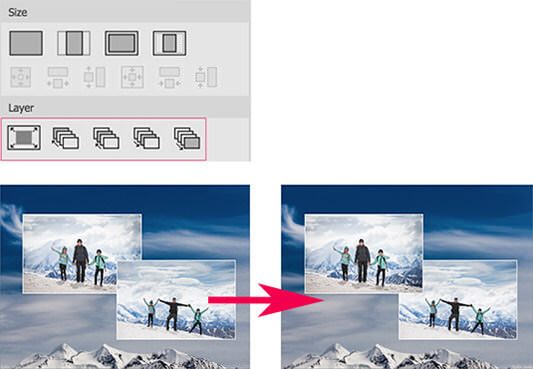
Photos and graphics can sit on top of a background or other photos. Use the Layer buttons to send photos backward or forward. To make a photo fill the page and sit on the back layer behind all other content use the Set As Background button on the far left of the Layers section of the Tools Panel. If you’re not happy with the position just hold down the space bar and drag it into place. Learn more.
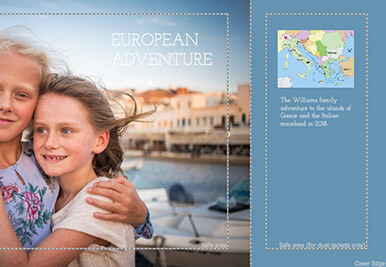
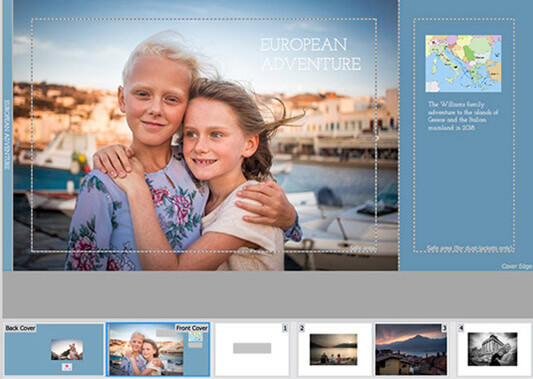
Cover View is where you design the layout for the front and back of your photo book's printed hardcover or dust-jacket. The book cover design is also used for a printed box cover, without the spine text and flap graphics. You design a cover just like you would a page in Layout View but you have a few more options - to set a background colour, add spine text, and add photos or text to the front or back flap of a dust-jacket. Click the Front Cover or Back Cover thumbnail at the bottom left of the software to access Cover View.
It’s often easier to design the cover after your pages, so you can add a photo and title that best reflect the story inside.
MORE
Set background colour
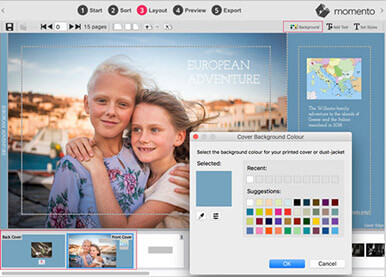
Click the Background icon on the top right of the software to open the Cover Background Colour window. Select your preferred option from the grid or use the colour picker icon to choose a colour from your photo. You can also edit any colour with the colour sliders. This colour will appear on any part of the cover or dust jacket that does not include a photo or image, and on the spine.
Add spine text
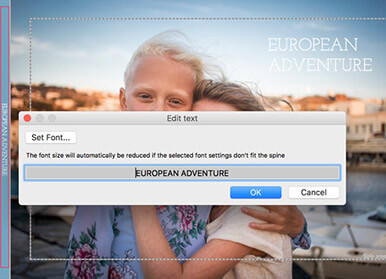
Double click in the spine area, the thin vertical panel on the left of the Cover in Layout View. This is where you can enter or edit the spine text. If needed edit the font, size and colour. Ensure you use a colour for the spine text, that will stand out against the background colour. Spine text is optional, but handy for finding your photo books easily on the book shelf.
Back cover
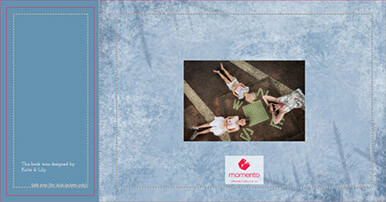
Access the Back Cover design by clicking on the Back Cover thumbnail on the far left of the thumbnails at the bottom of the software. If you have set the Background Colour it will already fill the Back Cover design. Add photos, backgrounds, graphics and text as preferred. The Momento logo will always be visible on the back cover so everyone knows who has printed your photo book.
Dust-jacket flaps
A dust-jacket is an optional extra you can add to your photo book. It wraps around the front, spine and back of the book and into the inside of the front and back cover. You can add content to the inside flaps via the right panel of the Front Cover and the left panel of the Back Cover.
Cover Preview
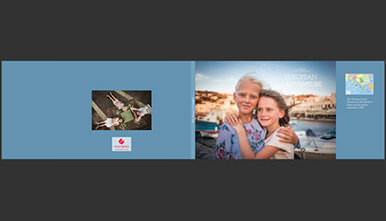
To see your full front, spine, back cover and dust jacket flap design in one view, click the Preview tab at the top of the screen. Note that you cannot edit in Preview mode. Click Esc to return to Layout View.
Should you choose to present your book in a Printed Clamshell box, its design will be taken from the front and back cover design. The spine text however, is not printed on a Clamshell box. See the details above for all the different tools you can use to layout your Printed box cover design.
To see your full front, spine, back cover and dust jacket flap design in one view, click the Preview tab at the top of the screen. Note that you cannot edit in Preview mode. Click Esc to return to Layout View.

When you're at the fine tuning stage of your design you may find it helpful to make Layout View fill more of the screen so you can see the details more clearly. To make the Content and Tool panels disappear, click on the < and > arrows in the top bar along side the panel tabs.
While you're finessing the layout of your project, you may also find it helpful to make Layout View fill the entire screen. Simply press the Tab key on your keyboard and the left, right and base panels will vanish. To return to normal view press the Tab or Esc keys.
.jpg)
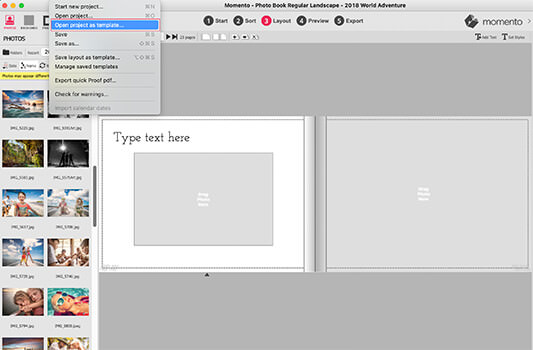
If you want to reuse a design for another project simply choose Open project as template in the File Menu then select the related project. The software will open a copy of the project with all the previous photos removed but the rest of the design and styles intact. You can then just drop your new photos into the blank placeholders and adjust the text to suit.
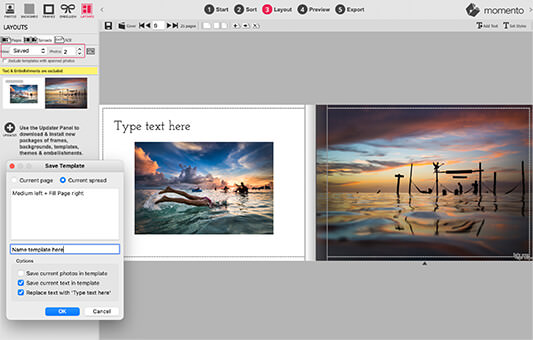
You can also save single pages or double page spreads as templates for reuse later. Simply select Save Layout as template in the File menu and choose whether to save it with the current photos or text included, or to replace the text with "Type text here." Any saved templates matching the format of your new project will then appear in the Layouts panel. Choose Saved in the View menu to see all saved templates. Double click or drag on a template to apply it to a new page or spread.
Here's some invaluable inspiration on designing a successful photo book from award-winning landscape and travel photographer, educator and editor of Better Photography Magazine, Peter Eastway.
What next?
Learn how to export and proof then upload and order, or discover how to design a great photo book.
Questions?
If you have any questions on how to make a photo book or need any help, don't hesitate to get in touch with our friendly service team by email, phone or our call back service.
Photo Credits: Katherine Williams